|
<< Click to Display Table of Contents >> Adding Event Types |
  
|
|
<< Click to Display Table of Contents >> Adding Event Types |
  
|
Open the Administration application.
Select the Static Data tab on the left of the window.
Select the Event Types tab displayed at the top of the window.
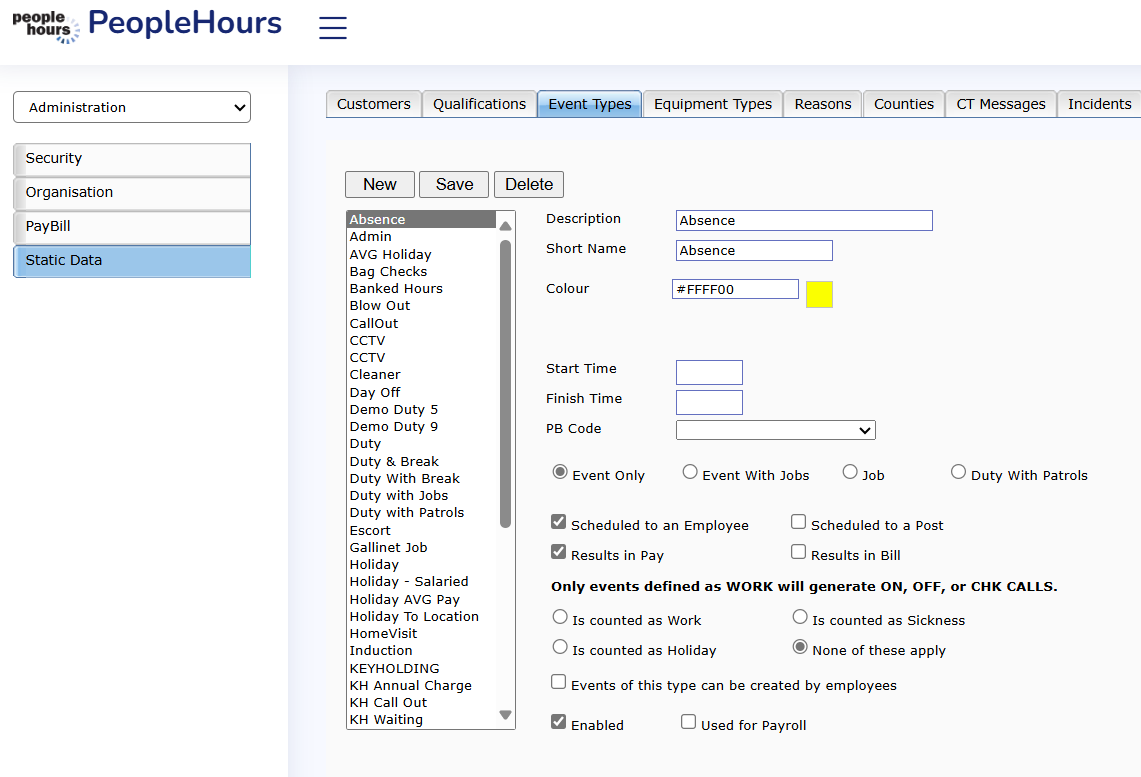
The Event Type window will be displayed. The existing Event Types will be listed on the left of the window.
 Event Types |
Click on the Description field and enter the long name of the Event Type you wish to add.
In the Short Name field and enter the short name for the Event Type. This is the name that will be displayed throughout the PeopleHours™ applications.
Click on the Choose Colour button and select the colour that you wish to attach to this Event Type.
This will be the colour that is displayed in the scheduling application employee view. The internal display code of the colour will be displayed in the Colour field.
Next add the default times to be applied when an event type of this type is selected. The default times can be overridden when the event is created.
If there is a specific PB code set up for the Event Type, tab to the PB Code field and select the relevant entry from the drop down list.
Next, tick the options that are relevant for this Event Type by clicking on the boxes to the left of the descriptions below the Colour button.
These determine whether the type will:
Event Only
Event with Jobs
Job
Scheduled to an Employee – the event can only be scheduled against an employee
Scheduled to a post – the event can only be scheduled against a location
Results in Pay – the employee will be paid
Results in Bill – the customer will be billed
Is counted as Holiday – hours count towards the employees annual holiday entitlement
Is counted as Work – hours count towards the employees weekly hours
Is counted as Sickness – hours count towards the employees annual sickness entitlement
Enabled – determines whether this event type can be used.
Click on the 'Save' button to save the data. The new Event Type will be displayed in the list.
To add another Event Type at this time, click on the 'New' button. The displayed data will be saved and a new blank record will be created.