|
<< Click to Display Table of Contents >> Creating Events for use with Jobs |
  
|
|
<< Click to Display Table of Contents >> Creating Events for use with Jobs |
|
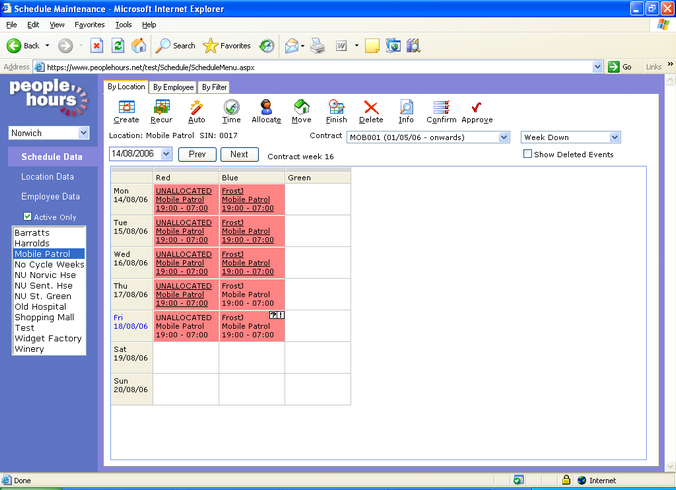
Select the Schedule Data tab from the left of the window.
Select the By Location tab from the top of the window.
The application will display the By Location window showing details of the selected location, if any.
Select your location from the list displayed on the left of the window.

Schedule View
Select the week that you wish to create Events for by selecting the correct date.
Select each of the days under one of the posts that you wish to create Diary Events for by clicking on them.
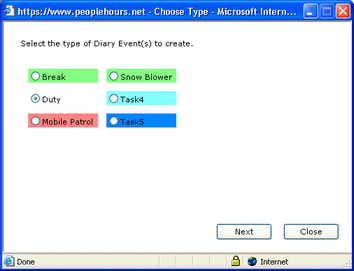
Click on the ‘Create’ button, if there has been more than one event type set up that can be scheduled to a post, the Choose Type window will be displayed.
If there is only one Event Type set up that can be scheduled to a post the display the employee selection window will be displayed.
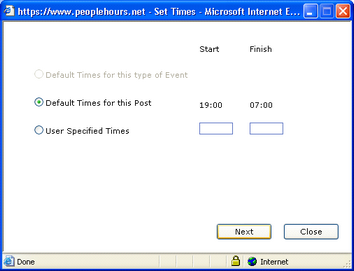
Select the Event Type required that allows you to schedule jobs and click on the ‘Next’ button. The application will display the Set Times window. This will display the default times of the post set up in Location Data.
Change the times if necessary.
Click on the ‘Next’ button.
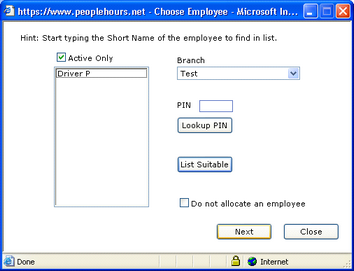
The Choose Employee window will be displayed.
Ensure that the ‘Do Not Allocate an Employee’ button is ticked. If it is not ticked, click on the field.
Click on the ‘Next’ button.
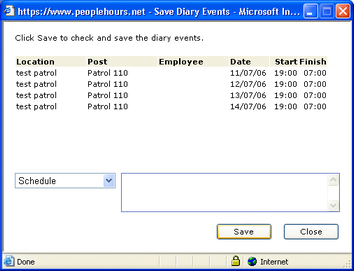
The application will now display the Save Events window. You can at this time enter a comment that will be saved against each of the events.
Click on the ‘Save’ button and the application will now create the events selected.
Repeat for each post set up for the location.